The Responsly–Notion integration copies each new survey submission into a Notion database you control. Map questions and metadata to Notion properties, then use filters, views, and comments where your team already plans work—so feedback sits next to specs, roadmaps, and CRM notes.
Each response becomes a new row in the database you choose, with values filled from your mapping. That pattern suits NPS follow-up, beta signups, support intakes, and any flow where Notion is the system of record after the form is submitted.
Before you begin
Make sure you have:
- a Responsly account with access to integrations,
- a Notion account with workspace permissions,
- a database in Notion where you want to store responses (you can also create a new one).
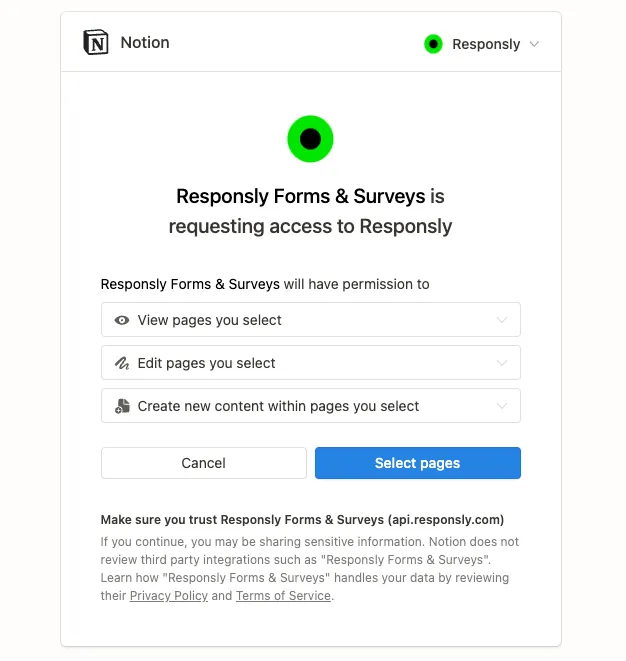
Step 1: Connect Responsly to Notion
- In Responsly, publish your form and go to the Integrations tab.
- Click Connect to Notion.
- Log in to your Notion account when prompted.
- If needed, switch workspaces in the top-right.
- Select the Notion pages you want Responsly to access and click Allow access.
Step 2: Map your fields
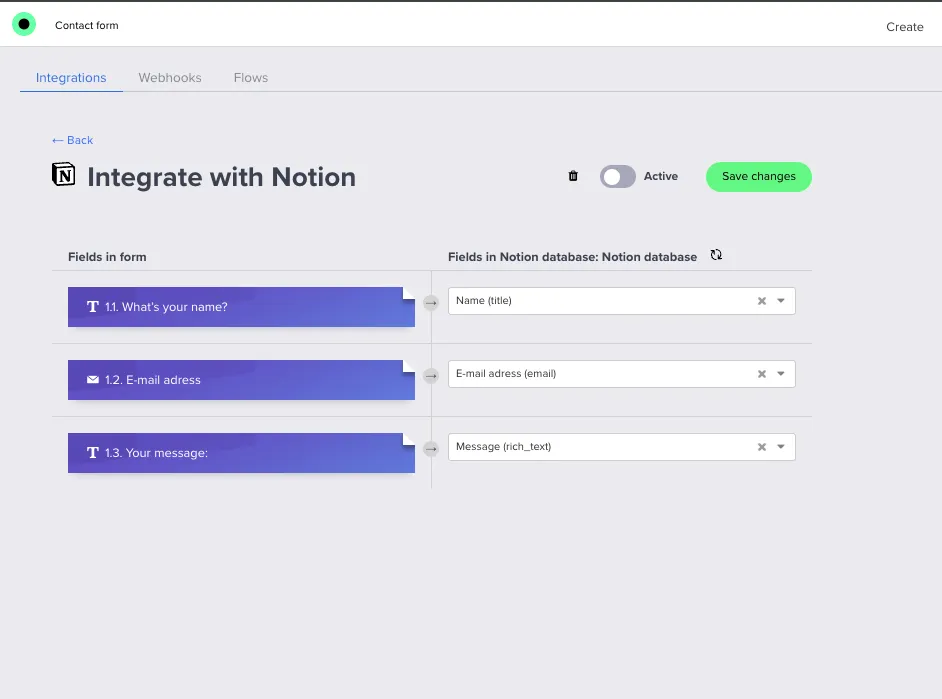
After connecting, choose the Notion database where you want to store responses, then map your Responsly form fields to the corresponding Notion properties.
Example:
- Responsly field: Name → Notion property: Name (Text)
- Responsly field: Email → Notion property: Email (Email)
- Responsly field: Message → Notion property: Message (Text)
You can add more Notion properties if needed and match them with your Responsly fields.
If a property does not exist yet (for example, a single-select “NPS segment”), create it in Notion first, then refresh the mapping view in Responsly.
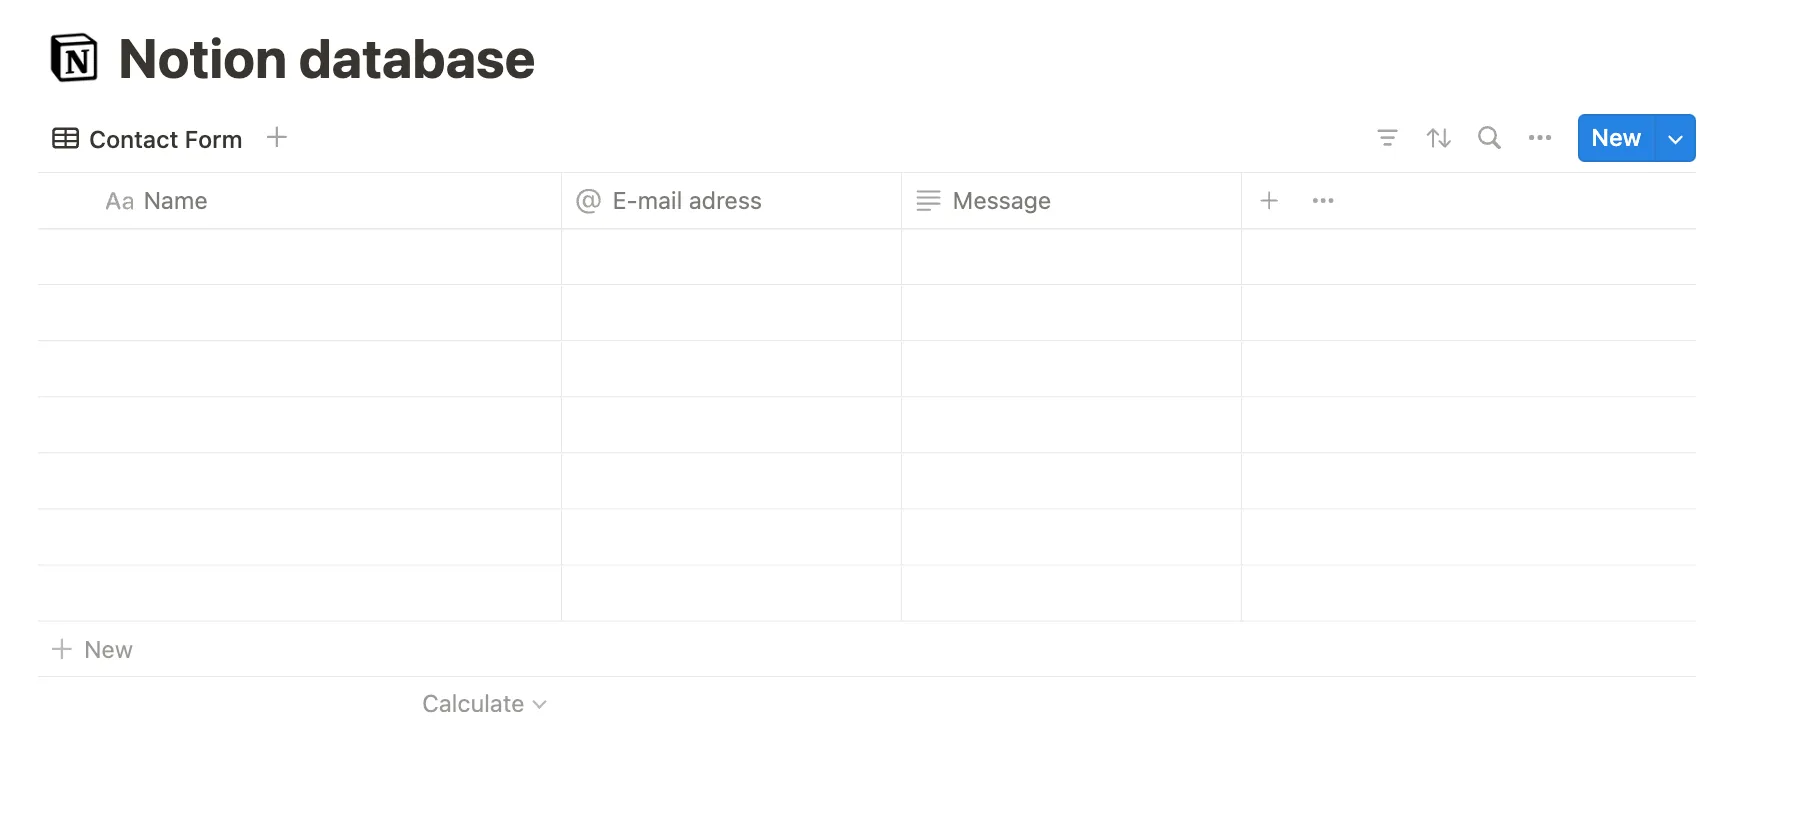
Step 3: Test the integration
- Submit a test response in your Responsly form.
- Open the linked Notion database.
- Verify that the response appears and that all mapped fields are correctly filled.
Step 4: Manage responses in Notion
Once connected, all new survey responses will be added to your chosen Notion database. From there, you can:
- filter, sort and group responses with Notion views (Table, Board, Calendar, Timeline, etc.),
- add extra columns for context (owner, status, tags, follow-up date),
- use comments and mentions to collaborate with your team on specific responses,
- build custom dashboards by combining survey data with other project information.
Tips & limitations
- The integration sends new responses only – existing historical responses are not back-filled automatically.
- Make sure field types match as closely as possible (for example e-mail → Email, number → Number) to avoid formatting issues.
- If you rename or remove properties in Notion, revisit the mapping in Responsly to keep it in sync.
For one-time or bulk data in spreadsheets, use How do I export survey data?. For custom automations beyond Notion, explore Webhooks or Connect Responsly to Zapier.